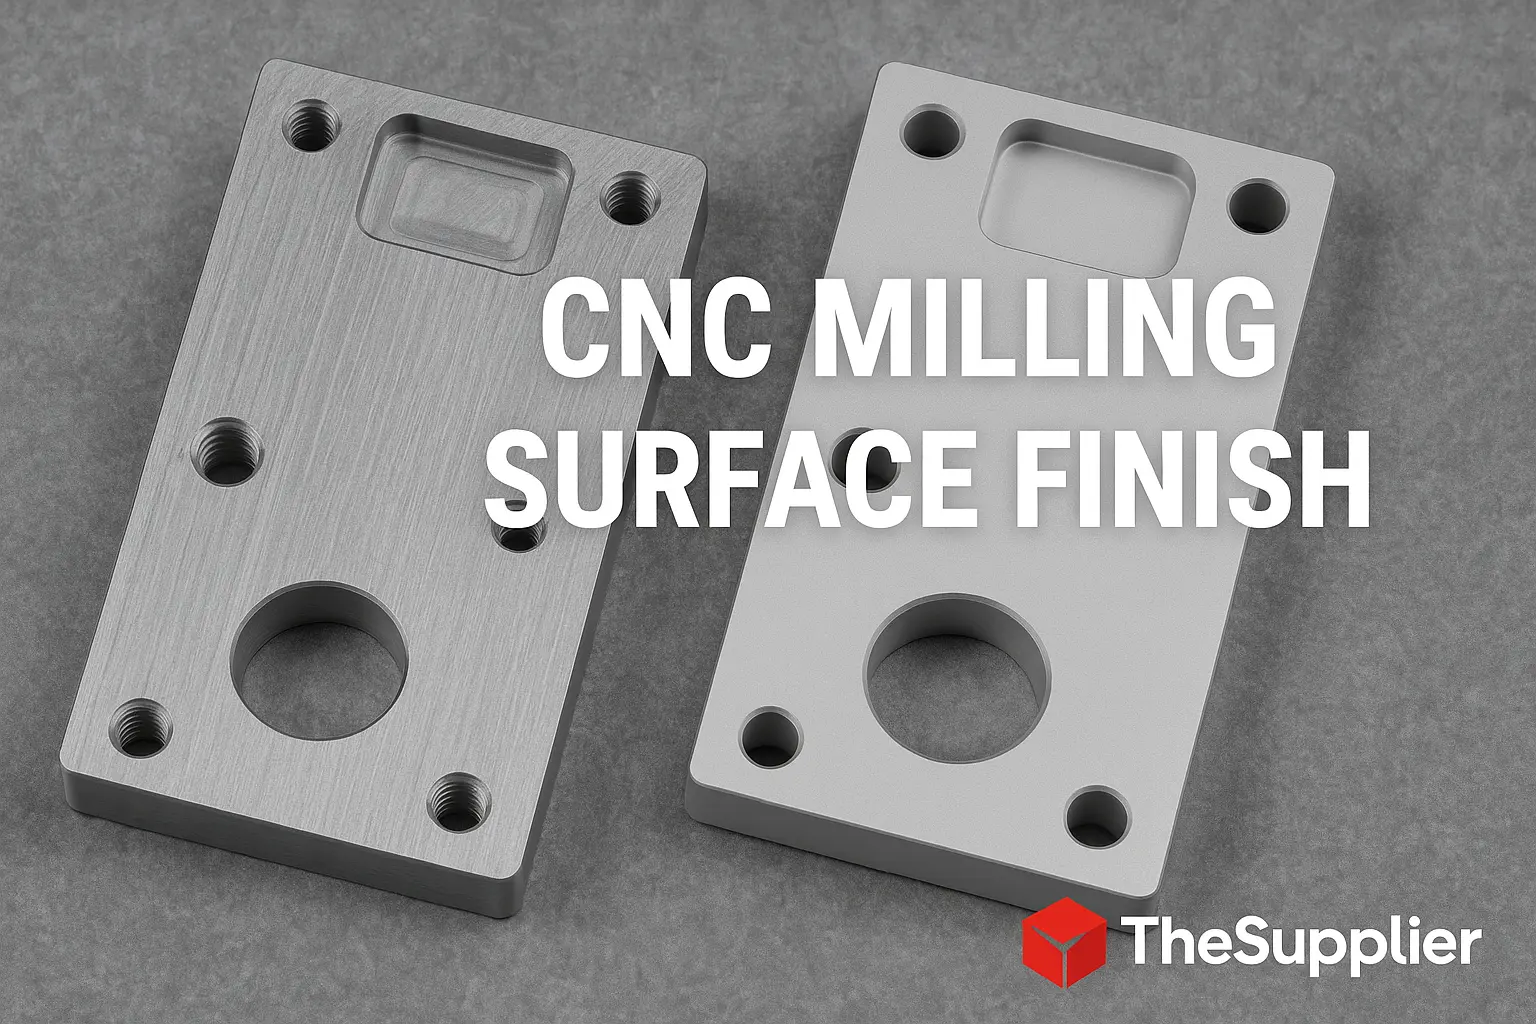
CNC Milling Surface Finish Guide: Ra Values, Visual Charts & Coating Impact
A clear buyer’s guide to Ra roughness in CNC milling—what the numbers mean, how to get the finish you want, and how anodizing/plating change both look and tolerance.
- Typical as-machined Ra: 1.6–3.2 µm (aluminum, fine pass)
- Bead-blast: hides tool marks but may raise Ra
- Clear anodize: adds thickness & alters perceived finish
What is Ra in CNC Milling?
Ra (Roughness Average) is the most widely used parameter for surface finish. It describes the average deviation of a machined surface from an ideal flat plane. The smaller the Ra, the smoother the finish.
Formula:
Ra = (1/L) ∫0L |y(x)| dx
where y(x) is the deviation of the surface profile from the mean line across length L.
- Units: Micrometers (µm) or microinches (µin)
- Lower Ra: smoother finish, tighter sealing surfaces
- Higher Ra: rougher finish, often acceptable for hidden faces
For formal definitions, see the ISO 4287 Surface Roughness Standard ↗ .
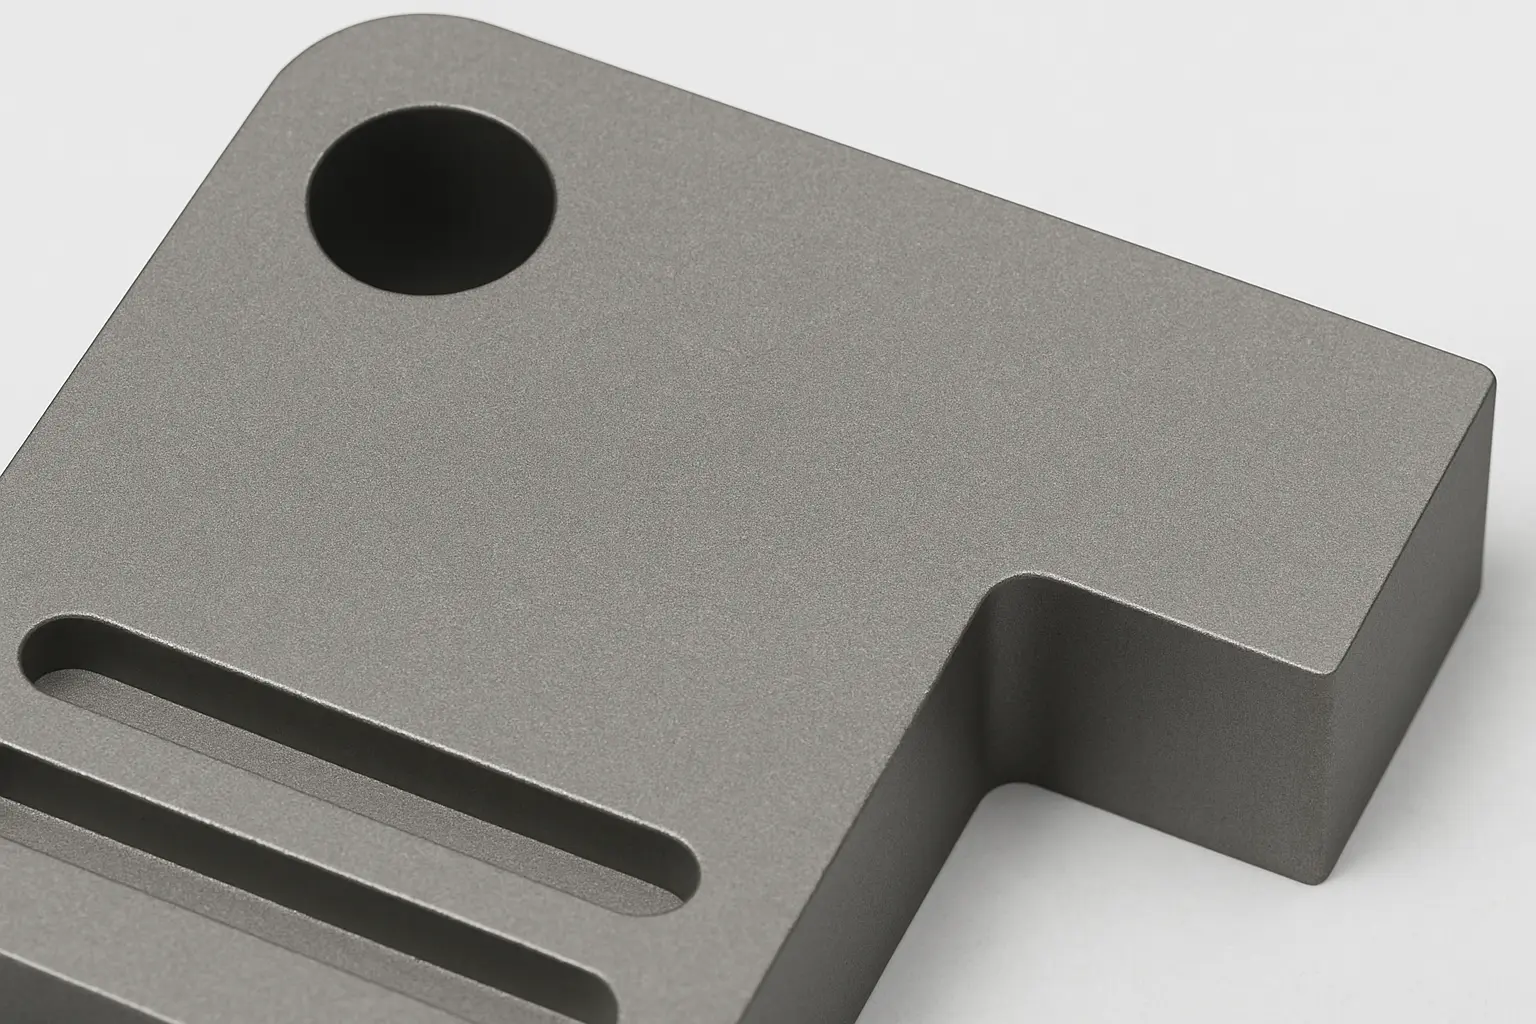
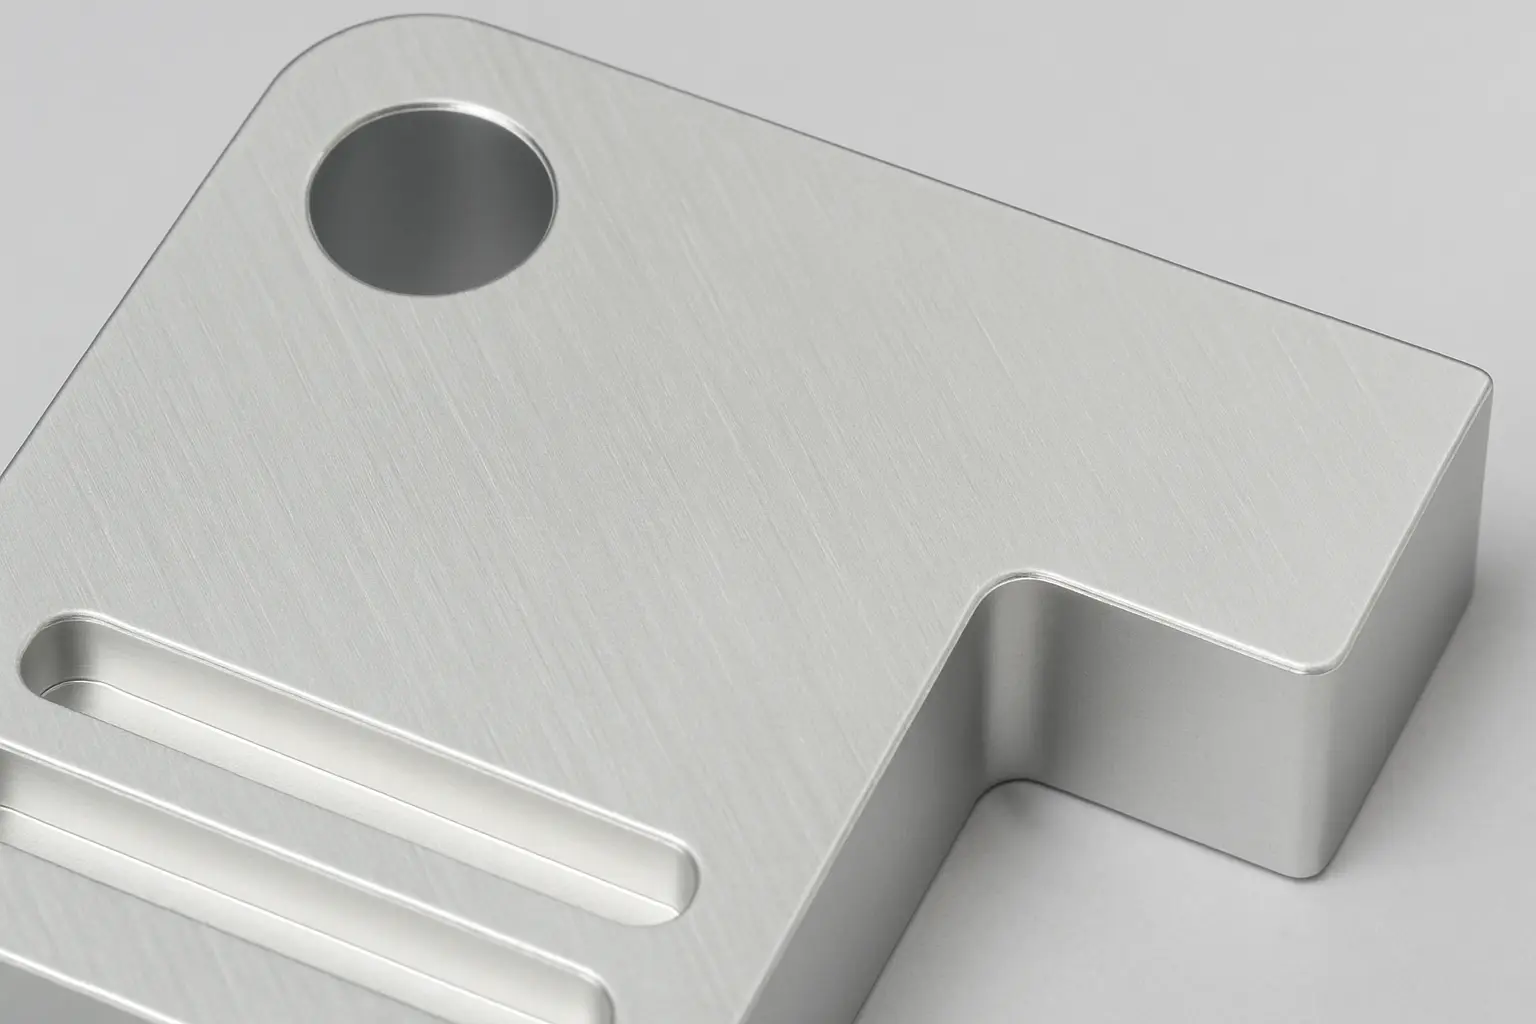
Ra Value Visual Chart for CNC Milling
Compare common milling finishes side-by-side. These real part photos show how surface routes affect look and typical Ra ranges.
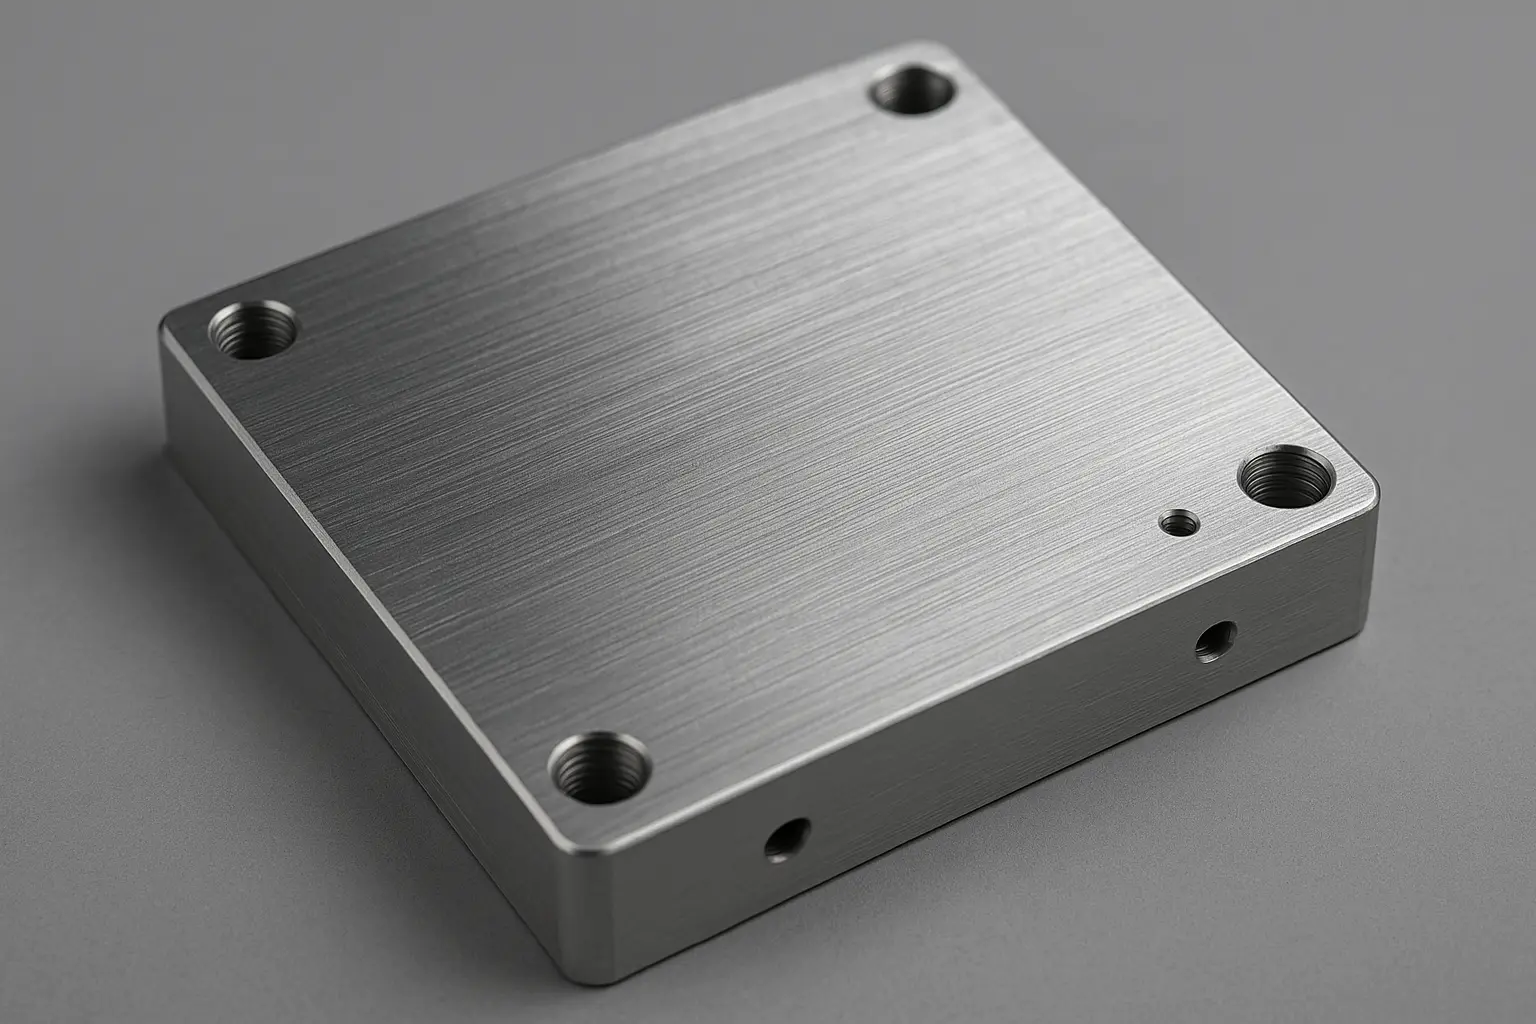
| Finish Type | Typical Ra (µm) | Notes |
|---|---|---|
| As-machined (fine pass) | 1.6–3.2 | Functional faces; tool marks visible |
| Bead-blast | 3.2–6.3 | Hides lines; raises Ra; great for cosmetics |
| Clear anodize (Type II) | — | Changes look; thickness ~5–15 µm; adjust fits |
| Polished / lapped | ≤0.2 | High cost; used for optics/seals |
Reference values: Engineering Toolbox ↗
Finish vs Function: When Smoothness Matters (and When Tool Marks Are Fine)
Specify low Ra only where it drives performance. For hidden or non-critical faces, standard as-machined is faster and more cost-effective.
Low Ra (≤ 1.6 µm) — Use on Performance-Critical Areas
- Sealing faces / gasket lands — reduces leakage and improves compression set.
- Sliding/contact pairs — lowers friction & wear, especially with coatings/oil.
- Optical / decorative zones — visible cosmetic areas or light guides.
- Press fits / tight tolerances — smoother peaks/valleys improve seating.
As-Machined (1.6–3.2 µm) — Best for Non-Critical Faces
- Hidden faces & stock surfaces — no sealing/fit requirement.
- Internal cavities where finish doesn’t affect function.
- Prototype runs — faster iteration, lower cost.
- Bead-blast + anodize for looks without chasing sub-micron Ra.
How to Improve Ra: Process Levers that Change Surface Finish
You can dial in surface finish without over-specifying drawings. Adjust these levers first, then apply coatings only if required by function or brand aesthetics.
| Lever | Change | Typical Effect on Ra | Notes |
|---|---|---|---|
| Feed per tooth (fz) | ↓ slightly | Smoother (to a point) | Too low can rub → poor finish & tool wear |
| Spindle speed (n) | ↑ | Often smoother | Watch for chatter; match SFM to material & tool |
| Step-over / scallop | ↓ | Smoother | More passes → longer cycle time |
| Toolpath strategy | Constant scallop | Smoother visual | Adaptive & finishing passes separate |
| Tool geometry | High-helix / sharp flute | Smoother on Al | Wiper inserts/end facets help on flats |
| Coolant / MQL | Optimize | Smoother & cooler cut | Chip evacuation prevents re-cutting |
| Runout & rigidity | Minimize | Major improvement | Collet condition, stickout, fixturing |
| Tool wear | Replace earlier | Restores smoothness | Insert indexing / endmill rotation plan |
Feeds & Speeds
- Rule of thumb: Start with recommended SFM & chipload for material/tool, then reduce fz 10–20% for finish passes.
- Avoid rubbing: If fz is too low, the cutter smears → worse finish. Keep chip thickness above the edge radius.
- Finish pass: One light, stable pass (0.1–0.3 mm radial) often beats many ultra-light passes that induce vibration.
Good primers: Sandvik Coromant — Milling Knowledge ↗, Harvey Performance — Surface Finish Basics ↗
Toolpath & Step-over
- Separate rough & finish: Adaptive roughing for metal removal; dedicated constant-scallop finishing for Ra control.
- Step-over (scallop height): Reduce for smoother finish on planar/3D surfaces; use wiper flats for better floor finish.
- Entry/exit: Lead-in/out with arcs; avoid dwell marks on the surface.
Tool Geometry & Holders
- Aluminum: High-helix, polished flutes, sharp edge prep → bright as-machined finish.
- Steels: Hone suited to material; consider variable pitch/helix to suppress chatter marks.
- Runout: ≤ 0.01 mm TIR at the nose is a practical target for fine finishes. Use quality collets or hydraulic chucks.
- Stickout: Keep as short as possible; stiffness scales with length³.
Coolant, Chips & Cleanliness
- Chip evacuation: Prevent re-cutting — the #1 hidden cause of poor Ra. Use flood/MQL + air blast intelligently.
- Coolant quality: Maintain concentration and filtration; tramp oil and fines degrade finish.
- Clean stock: Wipe surfaces before finish passes to avoid embedding debris.
Measurement rules reference: ISO 4288 — Surface texture: Rules & procedures ↗
Fixturing & Vibration Control
- Clamping: Rigid, consistent clamping pressure to avoid chatter and witness marks.
- Weight & damping: Add support under thin walls; consider sacrificial backing for floors.
- Machine state: Warm-up cycles and spindle bearings in spec reduce pattern banding.
How Anodizing Changes Surface Finish, Color & Tolerance
Anodizing builds a controlled oxide on aluminum. It can change perceived smoothness, add thickness, and slightly shift dimensions. Choose the route that fits function and brand aesthetics.
Clear Anodize (Type II)
- Optics: Preserves machining grain; brightens high-helix cuts.
- Thickness: ~5–15 µm typical; half grows outward, half inward.
- Ra impact: Visual smoothing, but measured Ra may not drop significantly.
- Best for: Consumer-facing parts needing corrosion protection.
Dyed / Hard Anodize (Type III)
- Optics: Dark tones hide tool marks better than clear.
- Thickness: Type III can reach 25–50 µm (application-dependent).
- Ra impact: Harder, matte look; can amplify flaws if prep is poor.
- Best for: Wear, abrasion, military/industrial duty.
Bead-Blast + Anodize
- Optics: Even, diffused texture; most consistent cosmetic look.
- Sequence: Bead-blast → clean → anodize → dye (if needed).
- Ra impact: Bead-blast raises Ra pre-anodize; final feel is premium matte.
- Tip: Mask sealing bands you need to keep low-Ra.
Tolerance & Drawing Notes
- Growth model: ~50% outward, ~50% inward — add a coating note for fits.
- Edges: Lightly break sharp edges to avoid dye pooling and flake.
- Color variation: Alloys & lot chemistry affect shade; set acceptable delta.
- Quality: Specify sampling + a color chip if brand-critical.
| Finish Route | Typical Thickness (µm) | Cosmetic Result | Tolerance Note |
|---|---|---|---|
| As-machined + Clear Anodize | 5–15 | Bright, retains tool pattern | Adjust press fits; ~50% inward growth |
| Bead-blast + Clear/Dyed | 8–20 | Premium matte, hides marks | Blast raises Ra; verify sealing bands |
| Hard Anodize (Type III) | 25–50 | Dark, very wear-resistant | Not for tight cosmetic colors; add fit note |
Standards & guidance: ISO 7599 — Anodizing of aluminum ↗ | MIL-PRF-8625 — Anodic coatings ↗
How Plating Changes Surface Finish & Tolerance
Metallic coatings can level or highlight machining marks, change gloss, and add measurable thickness. Plan finishes and fits together to avoid surprises.
Electroless Nickel (EN)
- Deposits: Uniform thickness, even in recesses; great for complex parts.
- Finish: Can improve perceived smoothness; micro-leveling on fine tool marks.
- Thickness: 5–25 µm common (application dependent).
- Note: Phosphorus content drives hardness/corrosion; specify mid/high-P as needed.
Zinc Plating (with passivation)
- Deposits: Sacrificial protection (steel); color via passivates (clear/blue/yellow/black).
- Finish: Follows base topography; limited leveling compared to EN.
- Thickness: 5–12 µm typical for industrial class.
- Note: Hydrogen embrittlement relief may be required for high-strength steels.
Decorative Nickel/Chrome Stack
- Deposits: Bright nickel provides most leveling; micro-cracked chrome for wear.
- Finish: Highly reflective — amplifies pre-polish quality.
- Thickness: Ni 10–25 µm + Cr 0.2–1.0 µm.
- Note: Best on pre-polished aluminum/steel; not a fix for rough milling marks.
Drawing & Fit Notes
- Growth: Add coating to allowance/clearance (bores/shafts/threads).
- Masking: Specify masked areas (e.g., ground fits, electrical contact pads).
- Sampling: State thickness verification method (XRF/weight gain/microscopy).
- Prep: Call out pre-plate finish (e.g., “as-machined Ra 1.6 µm max”).
| Plating Route | Typical Thickness (µm) | Finish Behavior | Tolerance Consideration |
|---|---|---|---|
| Electroless Nickel (mid/high-P) | 5–25 | Moderate leveling; uniform in pockets | Add 2×t to diameters; specify masked fits |
| Zinc + Passivate | 5–12 | Follows base; matte to semi-bright | Check pitch diameters/threads post-plate |
| Bright Ni + Chrome | Ni 10–25, Cr 0.2–1.0 | High gloss; amplifies polish quality | Decorative stack-up; avoid tight functional fits |
Authoritative specs: ASTM B733 — Autocatalytic (Electroless) Nickel ↗ | ASTM B633 — Zinc Coatings on Iron and Steel ↗ | ASTM B456 — Electrodeposited Nickel for Engineering ↗
Cost & Lead-Time Trade-offs in Surface Finish
Every step toward a smoother Ra adds machine time, inspection, and sometimes rework. Knowing the trade-offs helps you balance price vs. performance.
As-Machined (1.6–3.2 µm)
Default milling finish. Best price, fastest delivery.
- ✔ No extra process → lowest cycle time
- ✔ Perfect for hidden/functional faces
- ✘ Tool marks visible
Fine Milling (≤1.6 µm)
Requires extra finishing passes and stable fixturing.
- ✔ Better sealing, cosmetic upgrade
- ✔ Works for functional bands only
- ✘ Adds cycle time, higher scrap risk
Bead-Blast + Anodize
Two-step finish route. Excellent for visible surfaces.
- ✔ Premium matte look
- ✔ Corrosion protection included
- ✘ Raises Ra; seal bands must be masked
Polish / Lapping (≤0.2 µm)
High labor, specialty equipment. Reserved for critical optics or wear parts.
- ✔ Achieves mirror-like finish
- ✔ Essential for optical sealing surfaces
- ✘ Very high cost, long lead time
Inspection & Reports: How Surface Finish is Verified
Calling out Ra on a drawing is only half the job. You also need to define measurement method, sampling plan, and reporting to ensure suppliers inspect consistently and buyers trust the data.
1. Ra Measurement Tools
- Contact stylus roughness testers are industry standard.
- Cut-off length and filter settings must be defined.
- Portable testers can give quick shop-floor checks.
2. CMM & Certificates
- Ra is not always checked on a CMM; it needs a surface finish tester.
- However, CMMs + vision systems verify profile & flatness alongside Ra callouts.
- Request a surface finish certificate with inspection lot reports.
3. Sampling & Frequency
- Define how many parts per lot require Ra measurement.
- Example: “Ra check 1 per 50 pcs or per lot, whichever is greater.”
- Document frequency to avoid over-inspection costs.
Reference standard: ISO 4288 — Surface Texture: Rules & Procedures ↗ for measurement conditions and evaluation length.
Buyer Checklist: How to Specify Surface Finish the Smart Way
Copy these ready-to-use notes into your RFQ or drawing. Limit tight Ra to functional zones to keep cost and lead-time under control.
Drawing Callouts
- Finish parameter: Ra in µm (e.g., Ra 1.6 µm max).
- Exact location: Mark bands or faces (e.g., gasket land only).
- Symbol: Use surface texture symbol per ISO 1302 ↗.
- Edges: Break sharp edges (e.g., R0.2–0.5) to avoid coating flake.
Measurement Rules
- Method: Stylus roughness tester; state cutoff/filter (per ISO 4288 ↗).
- Sampling: Frequency per lot (e.g., 1 per 50 pcs or per lot, whichever is greater).
- Where: Measure within the marked band; avoid burrs and tool entry.
- Report: Include surface finish certificate with lot COA.
Coatings & Tolerance
- Anodize: Note growth model (~50% inward); adjust fits.
- Bead-blast: Raises Ra; mask sealing zones if needed.
- Plating: Add 2×thickness to diameters; specify masking for press fits.
- Color: Set acceptable delta/shade range for dyed finishes.
Cost Control
- Use as-machined on hidden/non-critical faces.
- Reserve Ra ≤ 1.6 µm for sealing/functional bands only.
- Prefer bead-blast + anodize for wide cosmetic areas.
- Request DFM feedback before freezing the spec.
Copy & Paste — Surface Finish Notes
SURFACE FINISH (CNC MILLING)
1) Parameter: Ra in µm. Unless noted, non-critical faces = As-machined (Ra 1.6–3.2 µm).
2) Critical zones: [Mark on drawing] require Ra ≤ 1.6 µm. Measure within marked bands only.
3) Measurement: Stylus roughness tester per ISO 4288; state cutoff λc and evaluation length on certificate.
4) Sampling: Ra check 1 per 50 pcs or per lot, whichever is greater. Include certificate with COA.
5) Edges: Break sharp edges R0.2–0.5 unless otherwise specified.
6) Bead-blast (if specified): Mask sealing bands. Clean before coat.
7) Anodize (if specified): Type & color [e.g., Type II clear]. Nominal thickness [e.g., 10 µm].
   Growth ~50% inward; adjust fits accordingly.
8) Plating (if specified): Route [EN mid-P / Zn passivate / Ni+Cr]. Nominal thickness [x µm].
   Mask critical bores/shafts. Post-plate acceptances defined on drawing.
9) Visual acceptance: Cosmetic faces free of dents/scratches ≥ 0.3 mm; uniform color within agreed delta.
10) DFM: Supplier may propose alternative routes to meet finish/fit at lower cost and faster lead time.
Need help tailoring these notes to your part? Get DFM help →
FAQs — CNC Milling Surface Finish
Concise answers to the most common buyer questions about Ra values, bead-blast, anodizing, and plating.
What is Ra and how is it measured?
Ra is Roughness Average — the arithmetic mean of surface deviations from a mean line. It’s measured with a stylus surface roughness tester using a defined cut-off and evaluation length per ISO 4288 ↗.
What Ra is typical for CNC milling “as-machined”?
For aluminum with a fine finishing pass, expect around Ra 1.6–3.2 µm. Better tooling, step-over and rigidity can push it lower; roughing passes will be higher.
Does bead-blasting make parts smoother?
Visually, bead-blast hides tool marks and gives an even matte. Metrologically, it usually increases Ra. Mask sealing bands you need to keep smooth.
How does anodizing affect Ra and size?
Clear/dyed anodize adds ~5–15 µm (Type II) and changes the look; measured Ra may not drop much. Growth is roughly 50% outward / 50% inward, so adjust fits on bores/shafts.
Which plating improves appearance the most?
Electroless Nickel can micro-level fine tool marks; bright nickel + chrome is highly reflective but amplifies pre-polish quality. For zinc, expect limited leveling.
What should I specify on my drawing to avoid disputes?
Call out the Ra value, exact location (bands/faces), measurement method and sampling plan. Add coating thickness notes and masking where needed. See the Buyer Checklist.
Can I mix cosmetic finishes and functional smoothness?
Yes. Use as-machined on hidden faces, Ra ≤ 1.6 µm on sealing bands, and bead-blast + anodize on visible areas. This keeps cost and lead-time under control.
Ready to Specify Your Surface Finish?
Whether it’s sealing faces with Ra ≤ 1.6 µm or cosmetic bead-blast + anodize, TheSupplier delivers CNC parts with the right finish, on time, every time.
Trusted by 20,000+ vetted suppliers. Backed by quality control and global shipping.
